 ultimate-guide
How to Install Natural-Looking Artificial Grass
Last Updated: October 25, 2026
Quick Summary
Artificial grass installation requires proper ground preparation, quality materials with colour variation and curved blades, and careful seaming to achieve a natural look. The foundation, pile height of 35-40mm, and attention to drainage determine whether your lawn looks convincing or obviously fake.
- Pile height should be 35-40mm for a natural-looking yet practical residential lawn.
- Colour variation mixing greens, browns and gold is the single biggest factor in realistic appearance.
- Ground preparation including drainage assessment and weed membrane prevents premature failure.
- Seams must be joined with proper adhesive and allowed 24 hours to cure fully.
- Brush your artificial grass every 4-6 weeks and remove debris weekly to maintain appearance.
Table of Contents
- Choosing the Right Artificial Grass for a Natural Look
- Preparing Your Ground Before Installation
- Building a Stable Sub-Base and Aggregate Layer
- How to Lay Artificial Grass Correctly
- Common Installation Mistakes and How to Avoid Them
- Artificial Grass Maintenance to Preserve Natural Appearance
- Getting Your Artificial Grass Installation Started
- Frequently Asked Questions
Choosing the Right Artificial Grass for a Natural Look
The difference between artificial grass that looks plastic and artificial grass that looks genuinely natural comes down to three things: yarn quality, blade shape, and colour variation. Get these right and your garden will look indistinguishable from real turf; get them wrong and neighbours' eyebrows will raise every time they see your lawn.
What Makes Grass Look Realistic
Real grass doesn't come in one shade of green. It mixes browns, golds, darker greens and lighter tones, with variation in blade height and density depending on wear and growth.
Blade shape matters equally. Real grass has rounded, slightly tapered blades, while cheap artificial grass uses flat, uniform blades that catch light unnaturally.
Pile Height, Blade Shape, and Colour Variation
Pile height is the blade length measured from backing to tip. For most residential gardens, 35-40mm is ideal: natural-looking yet practical for foot traffic and pets.
The density of the yarn, how many individual grass blades are packed into each square centimetre, directly affects how natural your artificial grass installation will look.
When selecting your artificial grass, ask the supplier for samples in different lighting conditions. Request to see examples of completed installations in similar settings to yours. Research from Montclair State University documented that artificial turf surfaces can reach significantly higher temperatures than natural grass, so if your garden gets intense afternoon sun, you'll want a product designed to resist heat absorption and discolouration.
These key specifications determine whether artificial grass looks convincing or obviously fake.
| Specification | Ideal Range | Why It Matters |
|---|---|---|
| Pile height | 35-40mm | Natural-looking yet practical for foot traffic |
| Pile height (shorter) | 20-30mm | Looks like golf course or sports field |
| Pile height (taller) | 50mm+ | Can look overgrown and flattens under use |
| Soil pH | 6.0 to 7.5 | Artificial grass performs best in this range |
Preparing Your Ground Before Installation
Most artificial grass installation failures happen before the grass arrives on site.
Removing Existing Turf, Weeds, and Debris
Start by removing every bit of existing turf, weeds and debris from the area where your artificial grass installation will go.
Use a flat-bladed shovel or turf cutter to strip away the top 50-75mm of soil and grass together, working methodically across the area.
Pay special attention to areas with weeds or moss, which indicate poor drainage or acidic soil.
Assessing Drainage and Site Conditions
Before building your sub-base, understand how water moves across your garden.
If your garden slopes naturally toward a drain or away from structures, you're in good shape.
Test your soil's drainage by digging a 300mm hole, filling it with water and observing how quickly it drains. If water disappears within 24 hours, drainage is adequate.
Building a Stable Sub-Base and Aggregate Layer
The sub-base is your foundation. A poor one creates an uneven surface, causes premature wear and makes your artificial grass installation look cheap within months.
Compacting the Foundation
Once you've removed existing turf and debris, you're left with exposed soil. This soil is soft and unstable.
If the existing ground is level and firm, compact it directly.
After compacting, the surface should feel firm and stable underfoot, with no sinking or shifting. Add more material and recompact any soft spots.
The compacted base layer should have a slight fall (slope) to direct water away from buildings and toward drainage areas.
Installing Weed Membrane and Drainage
Overlap the edges of the membrane by at least 150mm and secure them with landscape staples or ground pegs.
The weed membrane serves another purpose: it prevents the sub-base material from mixing with the soil beneath, which would compromise drainage. University of Florida IFAS Extension guidance notes that proper site preparation prevents long-term maintenance issues and extends the life of synthetic turf installations significantly.
How to Lay Artificial Grass Correctly
This is where your artificial grass installation becomes real.
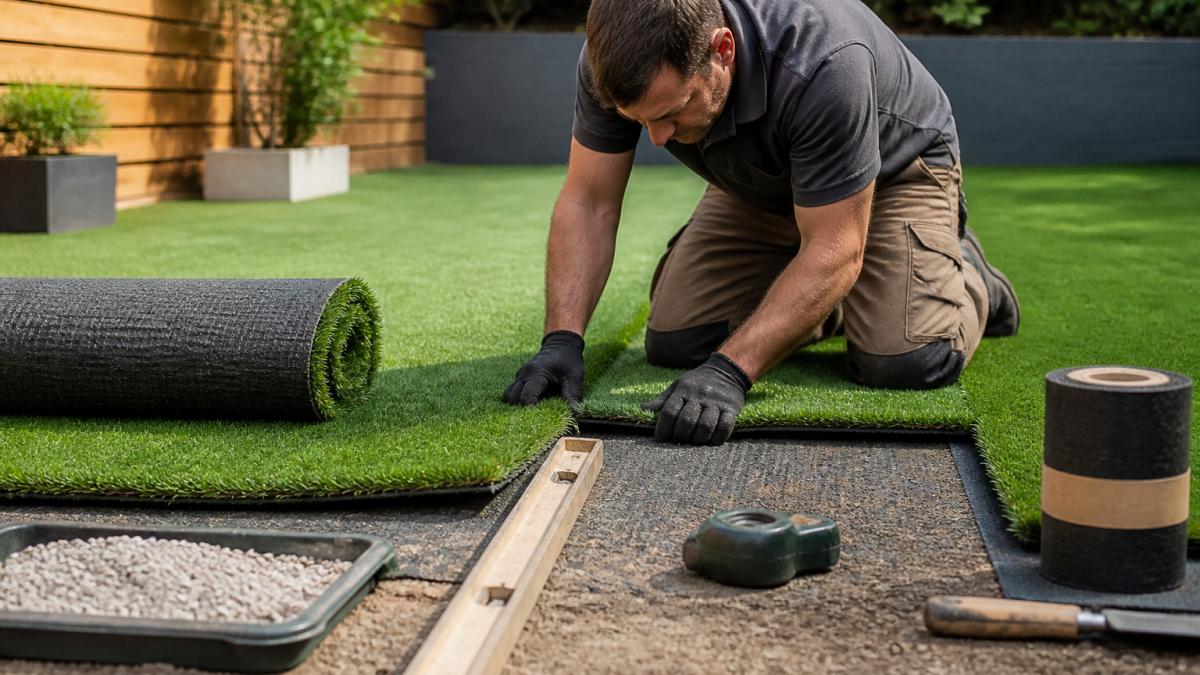
Measuring, Cutting, and Aligning Rolls
Before unrolling any artificial grass, measure your garden carefully at multiple points.
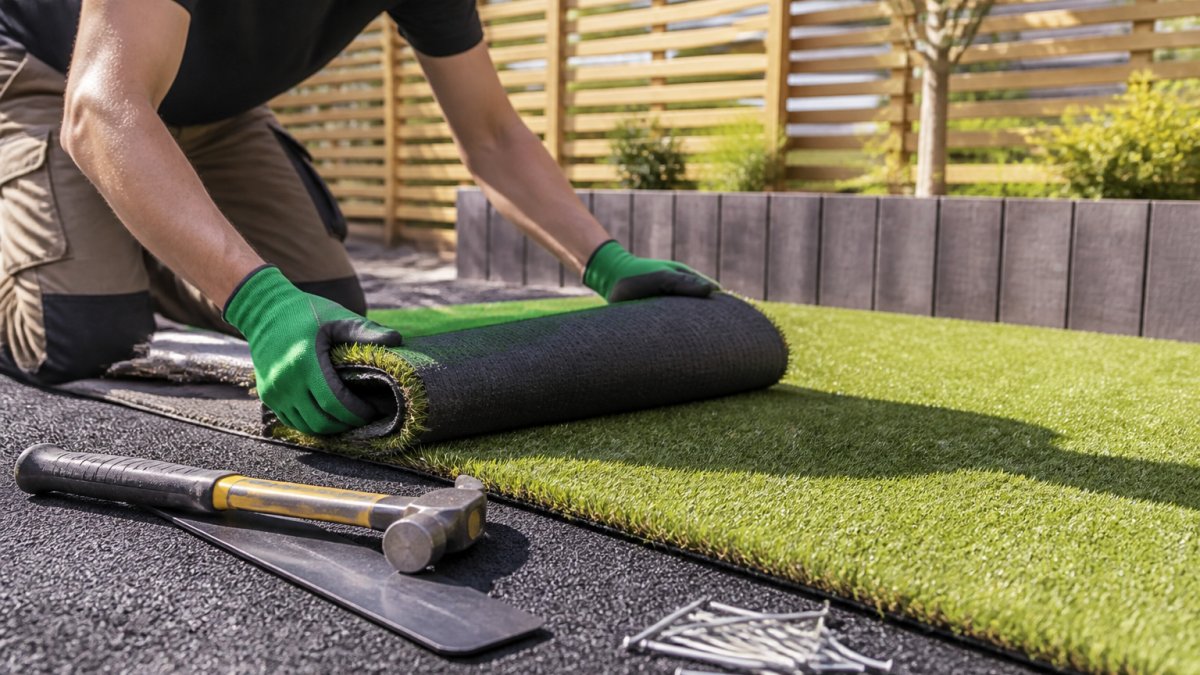
Artificial grass comes in rolls, typically 2 or 4 metres wide. Lay out your rolls to minimise seams, since fewer seams make your artificial grass installation look more natural. Plan the layout so seams run in one direction, ideally not across high-traffic areas.
Joining Seams and Securing Edges
Seams are the weak point in any artificial grass installation. A poor seam telegraphs the fact that you're looking at artificial turf.
For seams, use seam tape and adhesive designed for artificial grass.
Allow the adhesive to cure fully before walking on the seam; most products need 24 hours.
At the perimeter of your artificial grass installation, secure the edges using landscape staples or ground pegs spaced every 150-200mm.
Brushing and Final Finishing
Brushing makes seams less visible by lifting the pile around joins, and helps the grass settle and lock fibres into final position.
Common Installation Mistakes and How to Avoid Them
The most common mistake is skipping proper ground preparation: homeowners remove the turf, lay the grass and call it done. Six months later the surface is uneven, water pools and weeds grow through.
Another frequent error is underestimating slope and drainage. Flat installations without water management lead to soggy, smelly lawns that fail prematurely.
Poor seaming is visually obvious. Seams that are too loose, not fully cured, or misaligned create visible lines across your garden. Take time to get seams right. Use the correct adhesive, apply it properly, and allow full curing time.
Many people also choose artificial grass based on showroom appearance alone, but showroom lighting is nothing like your garden's.
Artificial Grass Maintenance to Preserve Natural Appearance
Your artificial grass installation doesn't require mowing, watering, or fertilising. But it does require maintenance. Neglect, and it will look worn, dirty, and obviously artificial within a couple of years.
Regular Brushing and Debris Removal
Brush your artificial grass every 4-6 weeks with a stiff-bristled brush to remove surface debris, prevent the pile matting down and keep it fresh and upright. Brushing also distributes infill evenly, extending the life of your artificial grass installation.
Remove debris regularly: leaves, twigs and organic matter trap moisture and encourage algae and mould. A quick weekly sweep or light rake keeps your lawn looking good and prevents problems.
Managing Infill and Addressing Wear
Most artificial grass installations use infill, usually sand or a sand-rubber blend, to help the grass stand upright and provide cushioning. Over time it compacts and migrates, especially in high-traffic areas.
If you notice areas where the backing is visible or the grass looks sparse, you have two options: add more infill if it's an infill issue, or consider patching if the grass itself is damaged. Small patches can be cut out and replaced with new grass using the same seaming technique.
Getting Your Artificial Grass Installation Started
Creating a natural-looking artificial grass installation takes planning, proper technique and attention to detail. The difference between a garden that looks genuinely green and one that screams "fake turf" is the foundation work, material quality and care during installation.
At Custom Landscapes, we specialise in transforming gardens with artificial grass that looks real. We understand artificial grass is an investment in your home's value and your family's outdoor space, and we take that responsibility seriously.
If your garden needs artificial grass installation and you want it done right, get our services page to discuss your project.
For inspiration on what's possible, view our previous artificial grass installations. And when you're ready to move forward, contact us to discuss your garden transformation.
Frequently Asked Questions
How do you lay artificial grass properly?
Proper artificial grass installation starts with thorough ground preparation: remove existing turf and weeds, compact a stable sub-base using aggregate, install a weed membrane, and ensure drainage is adequate. Measure and cut your grass rolls to fit, align them carefully to avoid gaps, join seams using seam tape and adhesive, secure the perimeter with fixings, and finish by brushing the pile to achieve a natural appearance. Each step affects the final look and durability.
What preparation is needed before laying artificial grass?
Before laying artificial grass, remove all existing turf, weeds, and debris down to bare soil. Level the ground and address any drainage issues, as poor drainage causes pooling and premature wear. Compact the soil, then add a sub-base of aggregate (typically 40-50 mm) and compact it firmly. Install a weed membrane to prevent growth through the grass, and ensure the surface is level and stable. This preparation is essential for realistic appearance and long-term performance.
Which artificial grass pile height looks most natural?
Pile heights between 30 mm and 40 mm typically look most natural and realistic for residential gardens. This range balances visual appeal with durability and ease of maintenance. Shorter piles (under 25 mm) can look sparse, while taller piles (over 50 mm) may appear overly thick or artificial. Choose based on your setting: play areas benefit from slightly higher pile for cushioning, whilst formal gardens suit a more manicured 30-35 mm height with fine blade shape and good colour variation.
Is there artificial grass that looks and feels real?
Modern artificial grass has improved dramatically. Look for products with fine blade shapes, natural colour variation with multiple green and brown tones, realistic thatch, and appropriate density. Polymer yarn quality directly affects how natural it feels and looks. Higher-quality synthetic grass with UV-resistant polymers maintains colour and texture better over time. When installed correctly on a proper sub-base and finished with brushing, realistic artificial grass is difficult to distinguish from natural turf at a distance.
How do you make artificial grass look natural after installation?
After laying artificial grass, brush the pile thoroughly to lift and separate the blades, which creates a more natural, less flat appearance. Remove any visible seams by ensuring tight joins and proper adhesive application. Keep the surface clean and free of debris, and maintain consistent infill depth if you're using infill products. Regular light brushing (monthly or quarterly) helps maintain the natural look by preventing matting and keeping the pile upright.
Why does artificial grass sometimes look plastic or fake?
Poor-quality artificial grass with uniform colour, stiff blades, and high shine looks obviously plastic. Installation mistakes also damage appearance: inadequate brushing leaves the pile flat, uneven sub-base causes visible wrinkles, poor seam joins create obvious lines, and debris or algae growth makes it look neglected. Choose grass with realistic yarn, proper pile height (30-40 mm), and natural colour variation. Professional installation and regular maintenance preserve the natural look that budget options and DIY errors can easily ruin.
What tools and materials do I need for artificial grass installation?
Essential tools include a tape measure, sharp utility knife, compacting equipment (plate compactor or hand tamper), broom or stiff brush, and a seaming iron if using heat-activated seam tape. Materials needed are aggregate for the sub-base, weed membrane, seam tape or adhesive, grass rolls, and fixings (nails or pegs) for the perimeter. For sloped or terraced areas, you may need additional edging or reinforcement. Proper tools ensure clean cuts, tight seams, and a professional finish that looks natural.
How long does artificial grass installation take?
A typical residential garden installation takes 2-5 days depending on size, ground conditions, and complexity. Small, level gardens (under 50 square metres) may be completed in 2-3 days. Larger areas, sloped terrain, or sites requiring extensive drainage work take longer. Ground preparation, including turf removal and sub-base compaction, often takes as long as laying the grass itself. Professional installers work efficiently whilst maintaining quality, and the finished space is usable immediately after installation.
A natural-looking artificial grass installation isn't luck, it's the result of proper site preparation, quality materials, and skilled installation technique. Custom Landscapes brings all three to every project, delivering gardens that look genuinely green, require minimal maintenance, and enhance your home's value for years to come.